Ultra Low Power Battery Voltage Measurement
Introduction
The objective of this project is to write a sample code to read battery voltage in low power embedded devices. I am using Silicon Lab’s Thunderboard (EFR32BG22). However, the fundamentals of the firmware design can be used for any microcontroller for any embedded dev kit. Here, Thunderboard has ARM Cortex M33 based target device, with 512 kB Flash, and 32 kB ram.
Let’s get to the point, without mentioning every little details of this board. You can get those from here.
Internally, at GuardRFID, we use starter kit to design and develope the firmware for our BLE Tags. We can get access to following using Mini Simplicity Connector, which is really handy for debugging FW, Power Consumption etc.
- AEM
- PTI
- VCOM
- SWD
In most ultra low power embedded devices, for which the battery life estimate could range from 2 years to even 6 years, we do not have much flexibility in terms of adding additional passive/active components in the PCBA. Reason being, smaller footprints, and low cost requirements. Also, addition of these components contribute to higher power consumption.
So, how do you read battery voltage without using external components?
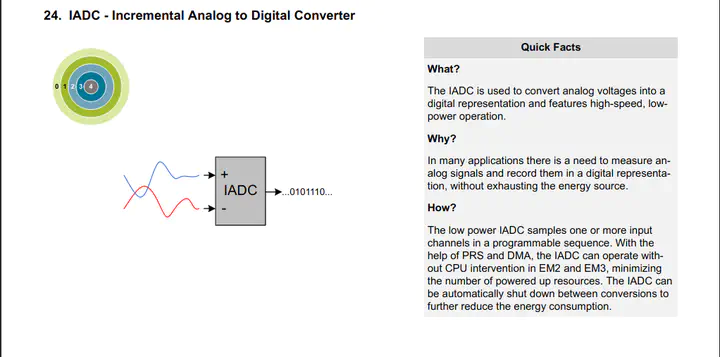
We utilize internal voltage reference of the SoC. Also, we have Analog to Digital(ADC) peripheral in almost every microcontroller. We can use internal VRef, and the ADC peripheral to read the connected battery voltage without the need of external components.
In ultra low power embedded systems, you would have a system tick of <x>. This X can range from 100 mS to 60 seconds, or more, depending upon the device and the functionality. In this project, we are going to use 10 minutes system tick.
Why 10 minutes?
Because, generally speaking, you don’t need to read battery voltage much often, as this devices have years of battery life. Whereas, if you were designing a firmware for android device, or any battery operated high power embedded device, then you would have a systick in the range of seconds. Otherwise, battery measurement is not a critical task that needs to addressed every few seconds.
The Concept
We measure the battery voltage against internal reference voltage. In the case of Thunderboard, we have 1.21 V internal reference voltage, which is maintained automatically by internal DC-DC circuits. Siliconlabs makes it easy to measure battery voltage by provides the AVDD pin, which outputs $$ AVDD = VCC / 4 \ \ (volt) $$
Why do we need this? We need this because, if you read say 1.5 volt with respect to internal voltage reference 1.21 V then you will cap it at 1.21 V. You can not read higher voltage level using ADC peripheral than internal voltage reference.
Normally, we have 3.3V coin cell battery powered embedded devices, where we would use this. So, in the case of thunderboard, we have $AVDD = (3.3) / 4 = 0.825, \ \ (< 1.21 \ \ v)$
In the case of full battery voltage, if we were to read AVDD against internal VRef of 1.21V using 12 bit ADC peripheral then, we can successfully read the battery voltage according to following formula,
$$\therefore batteryVoltage = (ADCRegisterData) * 1.21 / 0xFFF$$ $$ \therefore scaledBatteryVoltage = 4 * batteryVoltage $$This will give us the correct current battery voltage.
Demo Application Code
The demo code below demonstrates the this practically. Here, we are using a onboard push button as an interrupt to read the battery voltage, when the push button is pressed. You can find the github repository here.
#include "em_device.h"
#include "em_chip.h"
#include "em_core.h"
#include "em_cmu.h"
#include "em_emu.h"
#include "em_gpio.h"
#include "em_iadc.h"

/*******************************************************************************
 *******************************   DEFINES   ***********************************
 ******************************************************************************/

// Set CLK_ADC to 10 MHz
#define CLK_SRC_ADC_FREQ        20000000  // CLK_SRC_ADC
#define CLK_ADC_FREQ            10000000  // CLK_ADC - 10 MHz max in normal mode
#define EM2DEBUG                  1

/*******************************************************************************
 ***************************   GLOBAL VARIABLES   ******************************
 ******************************************************************************/

int32_t readBatteryVoltage ()
{

  uint32_t adc_Value;

  IADC_Init_t init = IADC_INIT_DEFAULT;
  IADC_AllConfigs_t initAllConfigs = IADC_ALLCONFIGS_DEFAULT;
  IADC_InitSingle_t initSingle = IADC_INITSINGLE_DEFAULT;
  IADC_SingleInput_t initSingleInput = IADC_SINGLEINPUT_DEFAULT;

  CMU_ClockEnable (cmuClock_IADC0, true);
  IADC_reset (IADC0);
  CMU_ClockSelectSet (cmuClock_IADCCLK, cmuSelect_FSRCO);

  init.warmup = iadcWarmupNormal;
  init.timerCycles = 200;
  init.srcClkPrescale = IADC_calcSrcClkPrescale (IADC0, CLK_SRC_ADC_FREQ, 0);

  // Internal Ref
  initAllConfigs.configs[0].reference = iadcCfgReferenceInt1V2;
  initAllConfigs.configs[0].adcClkPrescale = IADC_calcAdcClkPrescale ( IADC0,
                                                                       CLK_ADC_FREQ,
                                                                       0,
                                                                       iadcCfgModeNormal,
                                                                       init.srcClkPrescale);
  /*
   * Specify the input channel.  When negInput = iadcNegInputGnd, the
   * conversion is single-ended.
   */
  initSingleInput.posInput = iadcPosInputAvdd | 1;
  initSingleInput.negInput = iadcNegInputGnd;

  initSingle.triggerAction = iadcTriggerActionOnce;

  IADC_init (IADC0, &init, &initAllConfigs);
  IADC_initSingle (IADC0, &initSingle, &initSingleInput);
  IADC_command (IADC0, iadcCmdStartSingle);

  // Polling for results
  while ((IADC0->STATUS
      & (_IADC_STATUS_CONVERTING_MASK | _IADC_STATUS_SINGLEFIFODV_MASK))
      != IADC_STATUS_SINGLEFIFODV)
    ;

  adc_Value = IADC_pullSingleFifoResult (IADC0).data;
  double result = ((adc_Value * 4 * 1.21) / (0xFFF)) ;

  // Reset and stop IADC to save power
  IADC_reset (IADC0);
  CMU_ClockEnable (cmuClock_FSRCO, false);
  CMU_ClockEnable (cmuClock_IADC0, false);

  return (((int32_t) adc_Value * 4 * 1.21) / 0xFFF) + 500;

}

/**************************************************************************//**
 * @brief GPIO Interrupt handler for even pins.
 *****************************************************************************/
void GPIO_EVEN_IRQHandler (void)
{
  // Get and clear all pending GPIO interrupts
  uint32_t interruptMask = GPIO_IntGet ();
  GPIO_IntClear (interruptMask);
  int32_t batteryVoltage;

  // Check if button 0 was pressed
  if (interruptMask & (1 << 0))
    {
      batteryVoltage = readBatteryVoltage();
    }

}

static void gpioSetup (void)
{
  // Configure GPIO Clock. Note this is not required for EFR32xG21
  CMU_ClockEnable (cmuClock_GPIO, true);

  // Configure Button PB0 (onboard push button) as input and enable interrupt
  GPIO_PinModeSet (gpioPortB, 0, gpioModeInputPull, 1);
  GPIO_ExtIntConfig (gpioPortB, 0, 0, false, true, true);

  // Enable EVEN interrupt to catch button press that changes slew rate
  NVIC_ClearPendingIRQ (GPIO_EVEN_IRQn);
  NVIC_EnableIRQ (GPIO_EVEN_IRQn);
}

/**************************************************************************//**
 * @brief  Main function
 *****************************************************************************/
int main (void)
{
  CHIP_Init ();
  gpioSetup ();


#ifdef EM2DEBUG
#if (EM2DEBUG == 1)
  // Enable debug connectivity in EM2
  EMU->CTRL_SET = EMU_CTRL_EM2DBGEN;
#endif
#endif

  while (1)
    {
      // Enter EM2 sleep, wait for IADC interrupt
      EMU_EnterEM2 (false);
    }
}